To measure your panel coverage in 60 seconds without tools, start by taking clear photos of your roof or area you plan to install panels. Use a known object like a brick or your hand in the shot for reference. Compare the object’s size to the roof surface to estimate coverage. Think about roof shape and shading. If you wanna maximize accuracy and plan your setup better, keep exploring these quick tips.
Key Takeaways
- Use your hands, like spreading fingers or cupping palms, to quickly estimate panel size on the roof.
- Take a clear photo of the roof section with a reference object of known size nearby for scale.
- Count pixels of the reference object in the image to determine the pixel-to-real-world ratio.
- Break the roof into sections matching panel shapes and visually estimate usable surface area.
- Consider shading and obstructions to ensure accurate coverage measurement without tools.
Why Measuring Your Solar Panel Coverage Matters

Measuring your solar panel coverage is essential because it directly impacts your system’s efficiency and energy output. When you accurately gauge how much roof space your panels will occupy, you optimize solar panel efficiency by ensuring they’re positioned correctly and receive maximum sunlight. Proper measurement helps you avoid overestimating or underestimating your needs, saving money and boosting performance. Roof material considerations also come into play; some materials may require specific mounting techniques that affect coverage calculations. Additionally, proper measurement techniques can help you identify potential shading issues early in the planning process. Knowing your roof material can influence the type of mounting hardware you select, ensuring a secure and effective installation. Understanding solar panel orientation is crucial for maximizing sunlight exposure and overall energy production. Properly assessing shading factors can significantly improve your system’s overall efficiency. Conducting an initial site assessment can help you better understand these variables and plan accordingly. Ultimately, accurate measurement guarantees you get the most out of your investment, making your solar setup as efficient and productive as possible.
Get Your Roof Ready for a Fast Measurement

Before measuring your roof, make sure to clear away any debris so you can get an accurate reading. Check for signs of structural damage that could affect installation or safety. Also, verify that your roof receives enough sunlight to maximize your panel efficiency. Understanding your roof’s materials can help identify potential issues that might impact solar panel performance. Additionally, assessing your roof’s orientation can optimize panel placement for better energy production.
Clear Roof Debris
To guarantee accurate measurements, you need to clear your roof of any debris, such as leaves, branches, or dirt. Removing debris ensures you get a true sense of your roof’s surface and prevents interference with solar panel cleaning or roof insulation assessments. Here are four steps to prepare:
- Remove loose leaves and twigs that could obscure panel edges.
- Clear dirt and mud buildup that might hide damage or roof features.
- Sweep away small debris to prevent it from falling into gutters or causing blockages.
- Check for any stubborn debris that could affect your measurement process or damage your panels during cleaning.
- Additionally, inspecting for regional weather impacts can help you identify debris accumulation caused by storms or seasonal changes. Understanding storm debris buildup can assist in planning regular roof maintenance and ensure your measurement process remains accurate. Being aware of weather-related debris can also help you schedule cleaning after major weather events to maintain measurement accuracy.
- Regularly inspecting your roof for seasonal debris accumulation can help you stay ahead of potential measurement issues and prolong the lifespan of your panels. Incorporating weather pattern awareness into your maintenance routine can further optimize your roof’s condition and measurement reliability.
A clean roof makes measuring easier and ensures your solar panels fit properly, improving efficiency and lifespan.
Check for Structural Damage
Inspect your roof carefully for any signs of structural damage, such as cracked or missing shingles, sagging areas, or warped surfaces. Check for hail damage, which can cause dents or fractures that weaken the roof’s integrity. Pay attention to poor roof ventilation, as inadequate airflow can lead to moisture buildup, increasing the risk of rot and further damage. Look for areas where the roof appears uneven or has visible signs of stress. Addressing these issues now helps ensure your roof is stable enough for an accurate measurement of your panel coverage. Additionally, understanding building integrity can help you assess whether your roof can support the additional load of solar panels safely. Moreover, evaluating roof load capacity ensures your roof is structurally capable of handling the weight of new panels without compromise. It’s also wise to use proper safety precautions during your inspection to prevent accidents or injuries. Considering structural assessment can help identify potential vulnerabilities before installation, especially since Rhythm Failure emphasizes the importance of thorough preparation and evaluation in complex projects.
Ensure Adequate Sunlight
Ensuring your roof receives ample sunlight is essential for accurate panel measurement and ideal solar performance. Proper solar panel orientation maximizes exposure, so consider where the sun hits your roof throughout the day. Conduct a shading analysis by checking for obstacles like trees or chimneys that cast shadows, which can reduce efficiency. To prepare your roof:
- Identify the best solar panel orientation for *superior* sunlight.
- Remove or trim objects causing shade during peak sunlight hours.
- Use a simple shadow app or check manually to spot potential shading issues.
- Confirm that no new obstructions will develop over time, like growing trees.
- Regularly assess your system efficiency to ensure optimal energy production and identify any issues early.
- Keep in mind that shading analysis is vital to prevent unexpected performance drops over the system’s lifetime.
- Understanding solar access helps optimize your setup and maintain long-term energy gains.
- Remember that solar technology continues to improve, offering more efficient options for your system.
- Monitoring local urban pursuits can help you identify any new obstructions or changes in surroundings that might affect your solar setup.
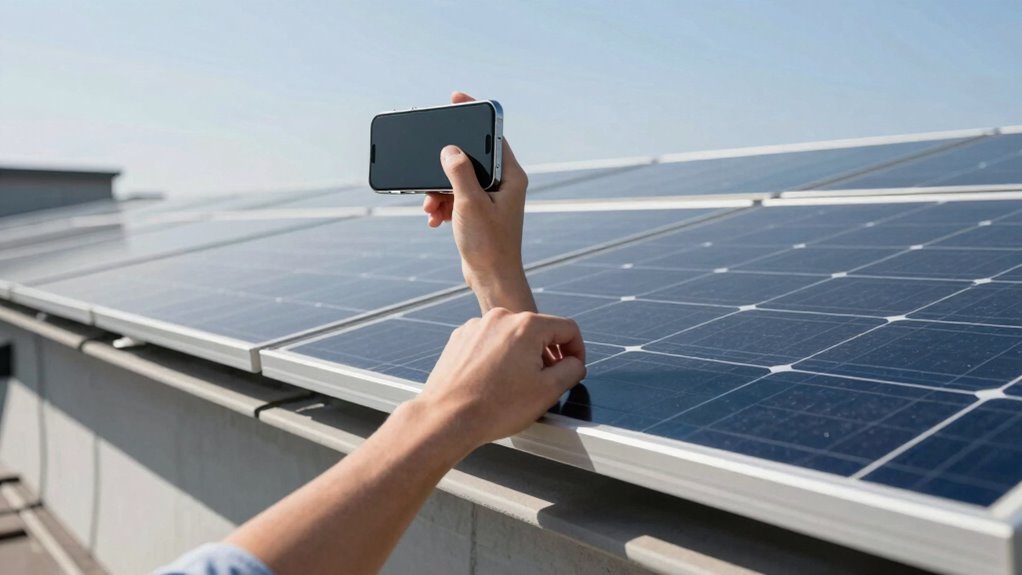
Estimate Panel Area With Your Phone
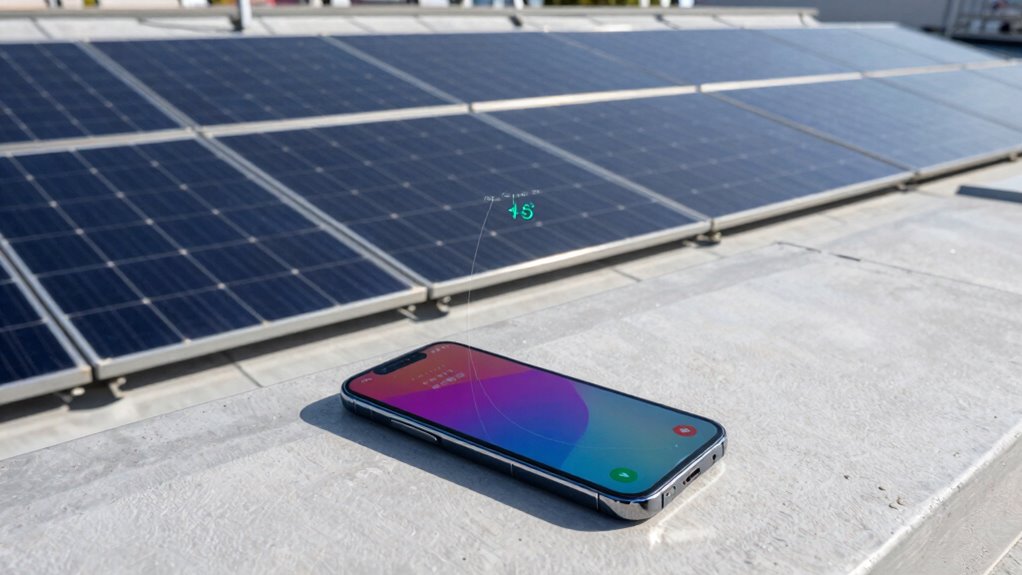
You can easily estimate your panel area using your phone by leveraging its camera and measurement apps. Many smartphones have built-in or downloadable tools that let you measure objects directly through your camera, making it simple to approximate your solar panel size without tools. This method is especially helpful for quick assessments during solar panel maintenance or when evaluating rooftop safety. Just take photos of your panels from a safe distance, then use the app to mark the edges and calculate the area. This approach guarantees you get a reasonably accurate measurement without risking your safety on the roof. Plus, it’s fast and convenient, giving you the info you need in just seconds—no tape measures or rulers required. Additionally, understanding your panel coverage helps optimize your energy efficiency and planning.
Compare Panel Sizes to Standard Dimensions
Knowing the common panel dimensions helps you quickly assess whether your panels match standard sizes. By comparing your measurements to typical dimensions, you can identify the closest standard options. This makes planning and installation easier and more efficient.
Common Panel Dimensions
Common panel dimensions vary widely, but most solar panels fall within standard sizes that simplify installation and system design. Knowing these common sizes helps you plan your setup efficiently. Typically, panels measure around:
- 65 inches by 39 inches (roughly 5.4 feet squared)
- 66 inches by 39 inches
- 72 inches by 40 inches
- 78 inches by 39 inches
These sizes influence panel orientation and shading analysis, ensuring ideal placement. Standard dimensions make it easier to estimate coverage and avoid gaps. When measuring your space, consider these sizes to match panel dimensions accurately. Recognizing common panel sizes also helps in understanding how your system fits together, making installation smoother and more predictable. Keep these figures in mind when planning your layout for the best efficiency.
Standard Panel Comparisons
Comparing your solar panel sizes to standard dimensions helps guarantee a proper fit for your installation. Standard panels typically measure around 65 inches by 39 inches, but variations exist that impact panel efficiency and inverter sizing. Knowing these dimensions allows you to optimize your layout and ensure your inverter can handle the total wattage. Larger panels often offer higher efficiency, meaning more power per square foot, but may require different mounting considerations. By understanding standard sizes, you can accurately estimate how many panels fit on your roof, avoid overloading your inverter, and improve overall system performance. This comparison simplifies planning, reduces surprises during installation, and helps you select the right panels for your energy needs.
Use Reference Objects in Photos to Calculate Coverage

To accurately gauge your panel coverage in photos, include a reference object of known size nearby. This helps with photo calibration, ensuring you measure correctly. Here’s how to do it effectively:
Include a known-sized object nearby to ensure accurate photo-based panel coverage measurements.
- Choose a reference object—like a standard brick or a ruler—placed next to your panels.
- Take a clear photo, ensuring the reference object is fully visible.
- Measure the reference object’s pixel length in your photo.
- Use the known size of the reference object to calculate the pixel-to-real-world ratio, enabling precise coverage estimates.
Estimate Surface Area Without Tools
You can estimate surface area quickly by using your hands as a reference. Spread your fingers to gauge length and width, or cup your palms to compare sizes. Visualizing the surface with these simple tools helps you make accurate approximations without any special equipment.
Use Your Hands
Estimating your panel coverage with your hands is a simple and effective method when you don’t have any tools on hand. Your hands can serve as a quick reference for approximate surface area, helping you assess rooftop shading and solar panel durability. To do this:
- Spread your fingers wide to estimate the size of a single panel.
- Use your palm to gauge the area of one panel.
- Stack your fists to approximate larger sections.
- Compare your hand’s size to the roof’s surface to get a rough measurement.
This method provides a practical way to visualize how much space your panels will cover without tools, ensuring you consider shading impacts and durability needs effectively. It’s a quick, handy approach for any DIY assessment.
Visualize the Surface
Visualizing the surface area of your rooftop without tools starts with a clear mental picture of its shape and size. Think about the panel orientation—whether it’s flat, sloped, or irregular—and how that affects coverage. Consider shading analysis: are there trees or structures casting shadows during peak sunlight hours? These shadows influence how much surface area is usable and help you estimate the effective area. Visualize the roof as a whole, breaking it into sections that match the shape, such as rectangles or triangles. By imagining these sections and how they align with your panels, you can better estimate the surface area needed. This mental approach allows you to gauge coverage accurately without any physical tools, making your solar planning quicker and more intuitive.
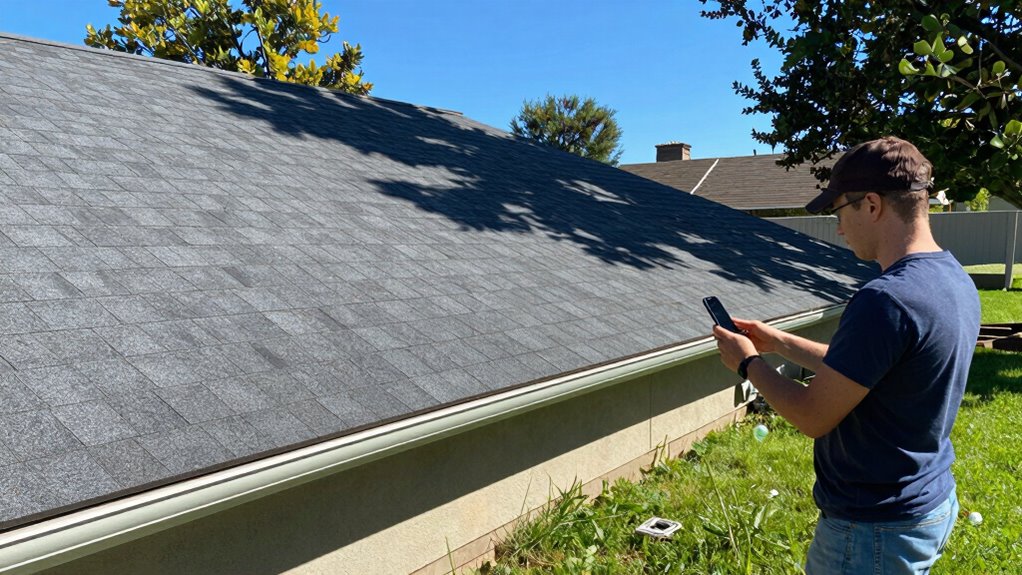
Top Tips for Visually Assessing Your Roof’s Solar Coverage

To effectively assess your roof’s solar coverage, start by taking a clear, unobstructed look from the ground or a safe vantage point. This helps you gauge how much space your panels will occupy and spot potential shading issues. Keep these tips in mind:
- Check for shade from nearby trees or structures that could affect solar panel efficiency.
- Note roof material considerations, as some materials may impact panel installation or performance.
- Observe the roof’s slope and orientation to ensure ideal sunlight exposure.
- Take a mental or quick visual count of available space for panels, ensuring enough coverage without overcrowding.
Being mindful of these factors will help you make informed decisions about your solar setup, maximizing efficiency and coverage while considering roof material considerations.
Understand Your Measurement Results and What’s Next

Once you’ve gathered your measurement data, it’s time to interpret what it means for your solar project. Accurate measurements help guarantee your panels are properly covered, which impacts installation safety and long-term performance. If coverage is less than expected, you might need to adjust the placement or add more panels to maximize energy output. Proper understanding also informs panel maintenance, as well-covered panels are easier to clean and inspect, reducing potential issues. Remember, thorough analysis now helps prevent future problems, saves costs, and keeps your system operating safely. Use your results to plan next steps, whether that’s optimizing coverage, scheduling regular maintenance, or consulting a professional for detailed assessment. Clear understanding now ensures your solar setup remains efficient and safe for years to come.
Common Mistakes to Watch Out For When Measuring

Measuring your solar panel coverage accurately is essential, but many people make common mistakes that can compromise their results. To ensure measurement accuracy, avoid these pitfalls:
Accurate solar panel coverage measurement avoids common pitfalls and ensures reliable results.
- Relying solely on estimation instead of precise measurement tools.
- Using inconsistent units or skipping conversions.
- Forgetting to measure the entire panel area, including edges and corners.
- Not double-checking measurements, leading to errors.
These mistakes can lead to inaccurate coverage estimates, affecting your planning. Always use proper measurement tools, such as a tape measure or ruler, and double-check your numbers. Keep measurements consistent and complete to get the most accurate results. Avoid rushing through the process, and take your time to ensure accuracy. Correct measurement techniques will save you time and prevent costly mistakes later.
Use Your Coverage Estimate to Plan Your Solar Setup
How can you make the most of your coverage estimate when planning your solar setup? First, consider your solar efficiency—how effectively your panels convert sunlight into electricity. Use your coverage estimate to determine the ideal number and placement of panels, ensuring maximum exposure. Conduct a shading analysis to identify potential obstructions like trees or buildings that could impact performance. This step helps you avoid installing panels in shaded areas, which can drastically reduce efficiency. Adjust your plan based on these insights to optimize energy output and cost savings. By leveraging your coverage estimate alongside shading analysis, you can design a system tailored to your space, ensuring your solar setup is both effective and efficient. This proactive approach maximizes your investment and energy gains.
Frequently Asked Questions
Can I Measure Irregularly Shaped Panel Areas Accurately?
Yes, you can measure irregularly shaped panel areas accurately. Focus on breaking down the panel shape into smaller, manageable sections with simple measurements. Use a flexible measuring tape or ruler to follow the curves and edges closely, ensuring measurement accuracy. By carefully combining these smaller measurements, you’ll get an accurate total area, regardless of the panel shape. This approach makes measuring irregular panels straightforward and precise.
How Often Should I Re-Measure My Solar Panel Coverage?
You should re-measure your solar panel coverage at least twice a year to stay on top of panel maintenance and guarantee ideal performance. Seasonal adjustments help account for shading changes or dirt buildup that can affect efficiency. Regular measurements allow you to spot issues early and maintain maximum energy output, especially after storms or significant weather events. Staying proactive ensures your system remains efficient and reliable throughout the year.
Are There Specific Apps Recommended for Quick Measurements?
When it comes to quick measurements, there are a few apps you can rely on. Popular measurement apps like SunSurveyor, SolarEdge, or PVWatts help you get fast estimations of your solar panel coverage. These quick estimation tools use your phone’s camera and GPS to provide accurate readings on the go. Don’t waste time guessing—try these apps, and you’ll get the info you need in a flash.
What Is the Best Time of Day to Take Roof Photos?
You should take roof photos in the early morning or late afternoon when the sunlight is softer and shadows are minimal. This helps you accurately assess your solar panel maintenance needs and guarantees rooftop safety by clearly showing the panels’ condition. Avoid midday shots, as harsh sunlight can obscure details. Proper lighting makes inspections safer and more effective, helping you identify issues quickly without risking safety or missing important details.
Do Measurements Vary With Different Camera Angles or Lighting?
Measurements can vary with different camera angles or lighting because of measurement consistency and lighting effects. When you change angles, you might distort the perspective, leading to inaccurate measurements. Similarly, lighting effects, such as shadows or glare, can obscure details or create illusions, impacting accuracy. To get the best results, keep your camera steady, maintain consistent angles, and shoot in even, natural light to minimize these variations.
Conclusion
Knowing your solar panel coverage in just 60 seconds can save you time and money. Did you know that accurate measurements can improve your system’s efficiency by up to 15%? By following simple tips, you guarantee your panels fit perfectly and perform at their best. Take a minute now to measure—your future energy savings depend on it. Don’t underestimate the power of quick, accurate assessments for a brighter, greener tomorrow.