To get the best results from your EMS device, focus on proper electrode placement. Place electrodes over the muscle belly and align them with muscle fibers, avoiding bones and tendons. Use anatomical landmarks for guidance and guarantee firm contact with clean skin. Adjust placement based on your body area and goals, and test muscle response to confirm correct positioning. Keep practicing these steps, and you’ll discover how precise placement boosts your EMS effectiveness.
Key Takeaways
- Place electrodes directly over the muscle belly, avoiding bones and tendons for effective stimulation.
- Align electrodes with muscle fibers to enhance muscle activation and contraction.
- Use anatomical landmarks and muscle anatomy knowledge for precise placement.
- Ensure good skin contact by cleaning the area and selecting appropriate electrode materials.
- Test and confirm muscle response during activation, adjusting placement for optimal results.
Why Proper Electrode Placement Is Critical for EMS Results
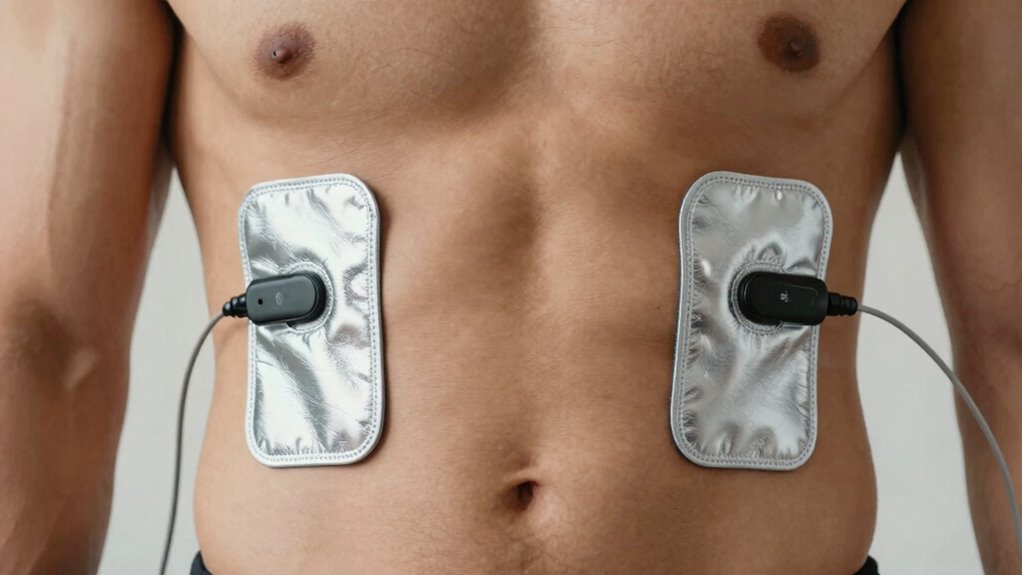
Proper electrode placement is vital for achieving ideal EMS results because it directly influences how effectively the electrical impulses target your muscles. Accurate placement ensures maximum muscle activation, maximizing the benefits of each session. When electrodes are correctly positioned, the electrical signals stimulate the right muscle groups, enhancing strength, tone, and endurance. Conversely, improper placement can lead to weak or uneven muscle activation, reducing effectiveness and increasing the risk of discomfort or injury. Prioritizing correct electrode placement also promotes electrotherapy safety, preventing unintended stimulation of surrounding tissues or nerves. Taking the time to identify precise locations for your electrodes; it’s a key step toward safer, more efficient, and more effective EMS training. Proper placement truly makes all the difference in achieving your desired results. Using electrical stimulation principles can also help in understanding how targeted stimulation improves overall muscle engagement.
How to Identify the Right Muscle Groups for Electrode Placement

To get the best results, you need to locate the specific muscle groups you want to target. Using clear anatomical landmarks makes it easier to find these muscles accurately. Once you identify the right areas, proper electrode placement becomes straightforward. Incorporating AI-driven anatomical analysis can further enhance the precision of muscle identification, leading to more effective EMS therapy. Additionally, understanding styling techniques for different muscle groups can help optimize your session outcomes. Recognizing the classic arcade games and their mechanics can also improve your overall understanding of targeted stimulation. Leveraging detailed knowledge of muscle anatomy can significantly improve placement accuracy and treatment efficacy. Furthermore, understanding the importance of placement ensures that EMS devices deliver stimulation to the intended muscles, maximizing benefits.
Locating Targeted Muscles
Identifying the correct muscle groups for electrode placement is essential for effective EMS therapy. To target the right muscles, you need to understand how muscle activation occurs during stimulation. Focus on where the muscle is most prominent and easily felt, as this indicates ideal electrode placement. Proper electrode alignment ensures the current flows through the desired muscle fibers, maximizing activation. Avoid placing electrodes over bony areas or tendons, which won’t produce effective results. Instead, locate the muscle belly—where the muscle feels firm and active when contracted. By correctly identifying these areas, you’ll improve stimulation efficiency, reduce discomfort, and achieve better muscle engagement. Additionally, understanding the role of muscle activation during electrical stimulation can help optimize your electrode placement for more consistent results. Remember, precise placement directly influences the effectiveness of your EMS sessions, making targeted muscle activation much easier. Recognizing muscle anatomy is fundamental to ensuring the stimulation reaches the intended muscle fibers effectively. Furthermore, understanding muscle fiber types can assist in customizing EMS settings for different training or therapeutic goals.
Using Anatomical Landmarks
Using anatomical landmarks is the most reliable way to find the right muscle groups for electrode placement. By identifying key landmarks, you guarantee proper muscle activation and ideal electrode alignment. For example, locate bony prominences like the iliac crest or clavicle to find underlying muscles. When placing electrodes on the thigh, use the patella and hip bones as guides to target quadriceps or hamstrings accurately. Proper landmarking prevents electrodes from shifting during activity, which maintains consistent muscle activation. Align electrodes parallel to muscle fibers for better stimulation and results. Additionally, understanding muscle anatomy helps ensure electrodes are placed precisely over the targeted muscles, enhancing the effectiveness of EMS therapy. Remember, precise placement based on anatomical landmarks leads to more effective EMS sessions, enhances comfort, and reduces the risk of ineffective stimulation or potential discomfort. Accurate landmarking is essential for maximizing your device’s benefits.
Step-by-Step Guide to Positioning Your EMS Electrodes

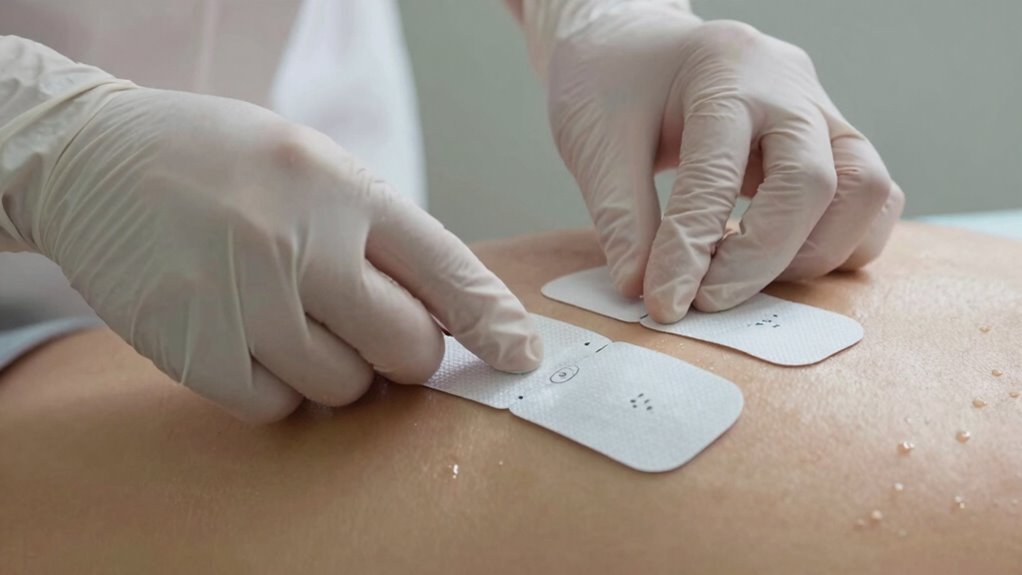
Properly positioning your EMS electrodes is essential for effective therapy and safety. First, choose electrode material suitable for your skin type—silicone or hydrogel work best. Prepare your skin by cleaning the area with alcohol wipes to remove oils and debris, ensuring good contact. Place the electrodes along the targeted muscle group, following anatomical landmarks for accuracy. Avoid placing electrodes over bony areas or scars, which can hinder conductivity. Use the table below as a quick reference:
| Electrode Material | Skin Preparation | Placement Tips |
|---|---|---|
| Hydrogel | Clean with alcohol wipes | Follow muscle fiber direction |
| Silicone | Dry skin for better adhesion | Keep electrodes a few cm apart |
| Gel-based | Remove excess oils | Ensure firm contact |
Additionally, understanding electrode placement principles can greatly improve treatment outcomes. Proper electrode contact also helps in reducing skin irritation and ensures consistent stimulation. Maintaining correct electrode positioning can enhance the overall effectiveness of your EMS sessions. Ensuring the correct placement of electrodes enhances not only the effectiveness of the therapy but also the safety and comfort of the user. Using the correct placement techniques can prevent discomfort and optimize muscle engagement during sessions.
Common Placement Mistakes and How to Fix Them

One common mistake is placing electrodes over bony areas or scars, which can block electrical signals and reduce treatment effectiveness. Electrode misalignment often occurs when electrodes aren’t positioned correctly or vary between sessions, leading to inconsistent stimulation. To fix this, verify your electrodes are placed on smooth, muscle-rich areas, avoiding bones and scars. Maintain placement consistency by marking spots or using a template for every session, so your electrodes stay in the right position. Avoid shifting electrodes or guessing placements, as this diminishes results. Proper alignment and consistent placement help your EMS device deliver ideal stimulation, improve muscle engagement, and maximize benefits. Being precise and mindful of electrode positioning guarantees you get the most out of each session. Additionally, using proper tools and safety tips can help ensure your electrode placement remains accurate and safe throughout your treatments. Incorporating anatomy and surface landmarks can further enhance placement accuracy and treatment outcomes.
Adjusting Electrode Placement for Different Body Areas and Goals

To get the best results, you need to position your electrodes based on your specific body area and goals. Adjusting for different regions guarantees targeted stimulation and avoids ineffective placement. Using goal-oriented strategies helps you optimize your EMS sessions for maximum benefit. Incorporating knowledge about AI-driven customization can further enhance electrode placement by tailoring treatments to individual needs. Additionally, understanding body region considerations ensures that electrode placement aligns with anatomical differences and specific therapeutic objectives. Recognizing the importance of vetted placement techniques ensures safety and effectiveness during EMS use.
Targeted Electrode Positioning
Adjusting electrode placement is essential for optimizing EMS training and therapy outcomes across different body areas and goals. To do this effectively, choose the right electrode types suited for your target muscles and activity. Proper skin preparation is crucial; clean the skin thoroughly to remove oils and dead cells, ensuring good conductivity. Place electrodes directly over the muscle belly for precise stimulation, avoiding bony areas or joints that can diminish effectiveness. Keep electrodes aligned with muscle fibers to enhance contraction and reduce discomfort. Consistent positioning promotes reproducible results and reduces skin irritation. Remember, targeted placement enhances your EMS sessions, helping you achieve better muscle activation, faster recovery, and improved overall performance. Fine-tuning electrode positioning is a key step in maximizing your device’s benefits.
Adjusting for Body Regions
Since different body regions have unique muscle structures and sensitivities, tailoring electrode placement is essential for effective EMS sessions. You need to take into account the specific muscle activation patterns in each area. For example, on larger muscles like the quads, align the electrodes along the muscle fibers to optimize activation. On smaller or more sensitive muscles, such as around the shoulders or neck, adjust placement to avoid overstimulation and ensure comfort. Proper electrode alignment ensures the electrical current targets the correct muscle groups without diffusing into adjacent tissues. This tailored approach maximizes muscle engagement and reduces discomfort, making your EMS sessions more efficient. Remember, customizing electrode placement for each body region helps you get the best results while maintaining safety and comfort.
Goal-Oriented Placement Strategies
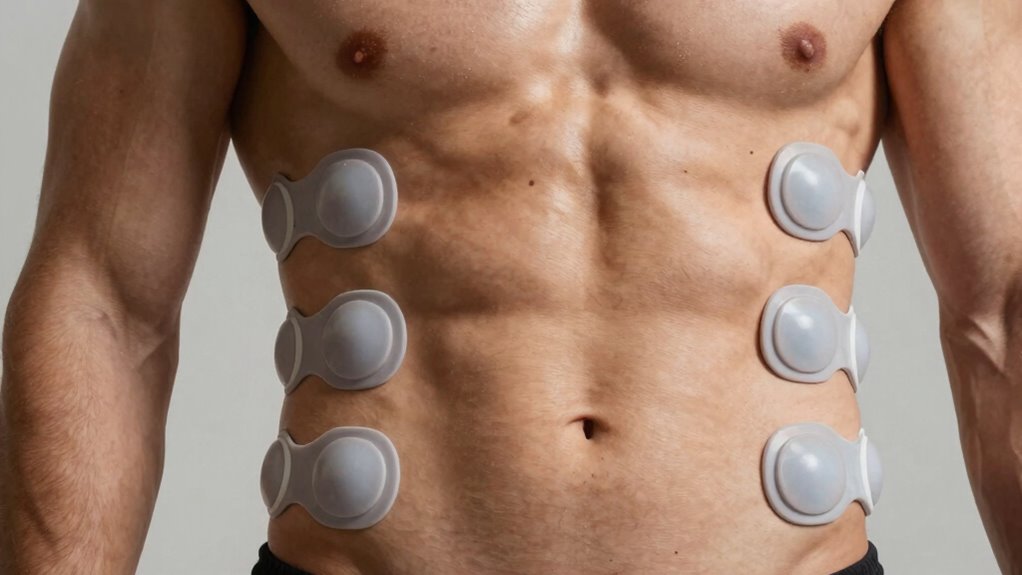
Optimizing electrode placement based on your specific goals guarantees you get the most out of your EMS sessions. For targeted muscle activation, place electrodes along the muscle fibers and ensure proper electrode alignment to maximize stimulation efficiency. If you want to strengthen your core, focus on placement around the abdominal muscles with precise alignment to engage deep layers effectively. For limb training, position electrodes near major muscle groups, adjusting for muscle size and shape. Remember, strategic placement enhances activation and prevents discomfort. Adjust the electrode positions based on your desired outcome—whether toning, strengthening, or rehabilitation—to optimize results. Proper alignment and position are key to engaging the right muscles and achieving your fitness goals efficiently.
How to Test and Confirm Your Electrode Placement Is Correct
To guarantee your electrode placement is correct, you need to verify that the electrodes are making proper contact with the skin and positioned accurately. Start with muscle testing by gently activating the EMS device and observing the muscle response. If you feel the muscle twitching as intended, your electrode verification is likely correct. If there’s no response or it’s weak, adjust the electrode placement slightly and re-test. Ensure the electrodes are firmly adhered and centered over the target muscle group. Check for consistent contact without gaps or wrinkles. Proper testing confirms your electrodes are positioned correctly, maximizing effectiveness and safety. Regular muscle testing during setup helps you catch any misplacement early, ensuring your EMS sessions deliver optimal results.
Maximizing EMS Effectiveness Through Proper Placement and Technique
Proper placement and technique are vital to getting the most out of your EMS sessions. When electrodes are correctly positioned, you enhance muscle activation, guaranteeing targeted muscles contract effectively. Using electrodes compatible with your device is essential; incompatible electrodes can reduce effectiveness or cause discomfort. Focus on placing electrodes along the muscle fibers for maximum stimulation. Keep the skin clean and dry to improve conductivity and electrode adhesion. Avoid placing electrodes over bones, joints, or sensitive areas to prevent discomfort and guarantee efficient muscle activation. Consistent placement ensures reliable results over time. By paying attention to proper electrode placement and selecting compatible electrodes, you maximize muscle activation and boost your EMS training’s overall effectiveness.
Frequently Asked Questions
Can Electrode Placement Vary Between Different EMS Device Brands?
Yes, electrode placement can vary between different EMS device brands. You should always follow each device’s specific instructions for electrode alignment to guarantee maximum effectiveness. Keep in mind that compatibility between the electrodes and the device is essential; using incompatible electrodes may reduce performance or cause discomfort. Always read the manufacturer’s guidelines carefully to maximize benefits and avoid issues caused by improper electrode placement or device compatibility.
How Often Should I Reposition Electrodes During a Session?
You probably think you can leave electrodes in place forever, right? Actually, for ideal results, you should reposition electrodes every 10 to 15 minutes during a session. This electrode repositioning helps maintain consistent contact, prevents skin irritation, and guarantees the EMS device works effectively. Don’t just set and forget—regularly adjusting them keeps your session safe and efficient, maximizing your workout or recovery benefits.
Are There Skin Types That Affect Electrode Adhesion and Placement?
Certain skin types can affect electrode adhesion and placement. If you have sensitive or oily skin, you might face adhesion challenges, causing electrodes to slip or lose contact. Skin compatibility varies, so it’s crucial to clean and dry your skin thoroughly before application. Using skin-friendly gels or adhesives can help improve adhesion. Paying attention to your skin’s response ensures better contact, ideal performance, and reduces discomfort during your EMS sessions.
How Do I Know if My Electrode Placement Is Causing Discomfort?
Ever wondered if your electrode placement is causing discomfort? You’ll notice electrode discomfort if you experience tingling, burning, or pain during use. Pay close attention to how you feel and adjust accordingly. Practice placement awareness by ensuring electrodes are positioned correctly and not too close to sensitive areas. If discomfort persists, recheck your placement, or consider changing the electrode position or skin prep to improve comfort and effectiveness.
Can Improper Placement Lead to Muscle Strain or Injury?
Yes, improper electrode positioning can lead to muscle strain or injury. When you don’t place electrodes correctly, it can cause uneven muscle activation, putting unnecessary stress on certain muscles. This increased strain may result in discomfort, soreness, or even injury over time. To prevent this, make sure electrodes are properly aligned with the muscle fibers and follow the recommended placement guidelines, promoting safe and effective muscle activation during your EMS sessions.
Conclusion
So, there you have it—master the art of electrode placement, and your EMS sessions will go from “meh” to “wow.” Forget the magic pills; all you need is a little patience, some strategic sticking, and maybe a mirror. With proper placement, you’ll be flexing those muscles like a pro in no time. Who knew that a tiny bit of placement wizardry could turn your sweat session into a muscle-building masterpiece?