
To guarantee your skin photos accurately show progress, keep lighting, background, and camera settings consistent each time. Use natural light or diffuse indoor lighting, choose a simple background, and take photos from the same angle and distance regularly. Clean your skin beforehand, stay in the same environment, and maintain a routine for photo sessions. Following these steps will help you see real changes; discover more tips to perfect your process as you go.
Key Takeaways
- Use the same lighting conditions, preferably natural light at consistent times, to ensure accurate skin tone representation.
- Maintain a fixed camera angle, distance, and framing in every session for comparable images.
- Prepare skin by cleansing and avoiding new products before photos to record true progress.
- Use a neutral, uncluttered background and avoid filters or edits to keep images consistent.
- Record and follow a regular routine, capturing photos at the same time each day or week for reliable tracking.

Handheld Dermatoscope, 500X Magnification Skin & Scalp Analyzer for Scalp/Hair Trichomes Facial Skin Dermatoscope, 16MP Camera for Hair Follicle Observation, Digital Microscope with 2.8" Screen
【2.8-inch Large-screen Dermatoscope | Ultra-clear Color Imaging】 Watch every detail instantly: Zoom in on skin texture, hair follicles,…
As an affiliate, we earn on qualifying purchases.
As an affiliate, we earn on qualifying purchases.
Why Consistent Photos Are Essential for Tracking Your Skin Progress
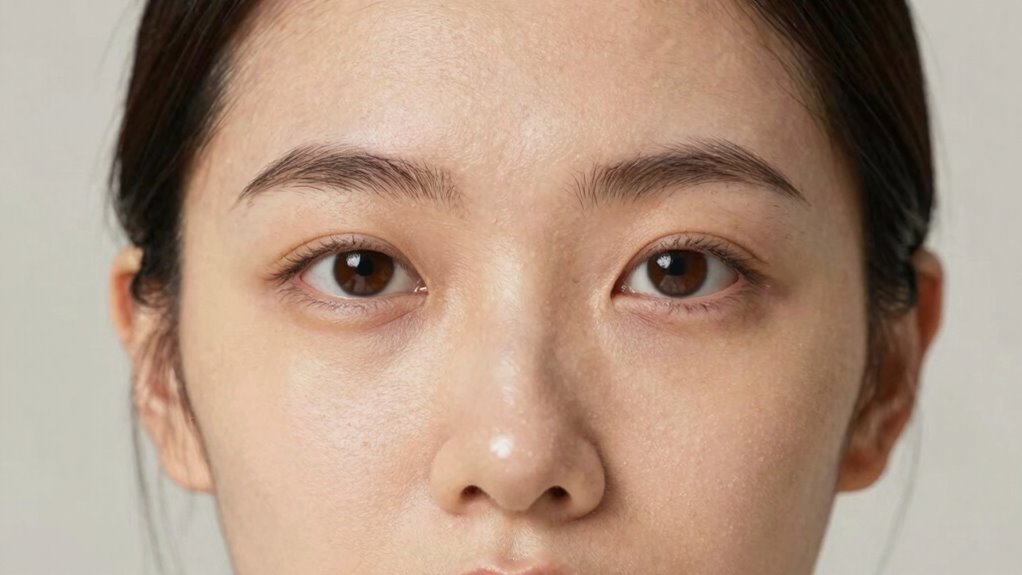
Taking consistent photos of your skin is essential because it provides an accurate way to monitor your progress over time. Photo documentation creates a visual record that reveals subtle changes you might not notice daily. By regularly capturing clear images, you can track improvements or setbacks, helping you adjust your skincare routine effectively. Consistent photos ensure your skin monitoring is reliable, minimizing guesswork and memory bias. When you compare images side by side, it’s easier to see how your skin responds to treatments or lifestyle changes. This visual evidence keeps you motivated and informed about what’s working. Additionally, understanding the importance of Free Floating can help you recognize the value of maintaining a steady photo documentation process, empowering you to make smarter decisions about your skincare journey. Recognizing the role of consistent photo-taking in your skincare routine can also improve your ability to notice even minor yet meaningful changes over time. Moreover, establishing a regular photography schedule can help you develop a consistent habit that enhances your overall tracking accuracy. Incorporating photo organization tools can further streamline your review process, making it easier to compare images over extended periods. Utilizing digital storage options ensures your photos are safely preserved and easily accessible whenever needed.

2-Pack LED Video Light Kit, NiceVeedi Studio Light, 2800-6500K Dimmable Photography Lighting Kit with Tripod Stand&Phone Holder, 73" Stream Light for Video Recording, Game Streaming, YouTube
【MULTIPLE COLOR TEMPERATURE & ADJUSTABLE BRIGHTNESS】There are 3 Color temperatures (2800K, 4800K & 6500K) which offer different lighting…
As an affiliate, we earn on qualifying purchases.
As an affiliate, we earn on qualifying purchases.
How to Prepare Your Skin and Environment for Reliable Photos

Preparing your skin and environment before photographing is crucial to guarantee consistent, accurate results. First, make sure your skin is clean and free of excess oils or makeup. Use gentle cleansers that won’t disrupt your skincare ingredients or topical treatments. Next, stick to a routine, avoiding new products that could alter your skin’s appearance. Finally, choose a stable environment: photograph in the same spot with consistent lighting and minimal movement. Consistent lighting conditions are essential for capturing comparable images over time. Consistency in these factors helps your photos reflect true changes, not variables. Remember, the goal is to track progress accurately, so avoid applying new skincare ingredients or topical treatments right before photos to prevent temporary skin changes. This preparation lays the foundation for reliable, comparable images. Additionally, controlling environmental factors such as lighting setup can significantly improve the photography consistency of your photos over time. Maintaining these conditions can also help reduce the impact of external variables that might otherwise skew your results. Incorporating proper camera settings can further enhance the clarity and uniformity of your images, making your progress easier to assess.
skincare progress photo organizer
As an affiliate, we earn on qualifying purchases.
As an affiliate, we earn on qualifying purchases.
Picking the Right Lighting and Background for Clear, Comparable Images

To get clear, comparable skin photos, you need consistent lighting and a simple background. Use natural light whenever possible and keep the background neutral and uncluttered. This approach helps make sure your images are accurate and easy to compare over time. Additionally, understanding the importance of color accuracy can help ensure your photos reflect true skin tones and conditions. Regularly calibrating your device’s display can also support consistent visual representation of your skin. Recognizing regional flavor insights can offer contextual understanding of diverse skin tones influenced by cultural backgrounds, enhancing your interpretation of skin variations. Incorporating community building principles can foster a supportive environment for tracking skin progress and sharing tips, making the process more engaging and sustainable. Recognizing golf heritage significance can also inspire patience and attention to detail, qualities valuable in capturing accurate skin images.
Consistent Lighting Conditions
Consistent lighting is essential for capturing clear, comparable skin photos. To achieve this, focus on three key aspects:
- Use the same lighting setup each time, whether natural or artificial, to avoid shadows and color shifts.
- If using artificial lighting, ensure it’s properly calibrated for color accuracy, which helps your photos reflect true skin tones.
- Avoid changing light intensity or direction; consistent placement prevents variations that can distort progress.
- Maintaining a stable indoor environment with controlled humidity and air quality can also help reduce unexpected light reflections or haze that might affect photo clarity.
- Selecting a battery inverter generator with consistent power output can ensure your lighting remains steady, especially during longer photo sessions.
- Consistent lighting practices support requirements traceability, making it easier to accurately compare photos over time and track skin progress effectively.
- Regularly inspecting your lighting equipment ensures consistent performance, helping to maintain lighting consistency across all photos.
- Ensuring your camera settings are constant, such as ISO and white balance, further supports photo consistency over multiple sessions.
Neutral, Uncluttered Backgrounds
Choosing a neutral, uncluttered background is essential for capturing clear, comparable skin photos. Opt for minimalist decor with plain walls or simple backdrops that don’t distract from your skin. A clean background helps highlight your skin’s true condition without interference. Aim for a color contrast that complements your skin tone—light backgrounds work well for darker skin, and darker backgrounds suit lighter skin. Avoid busy patterns or clutter that can draw attention away from your skin. Consistency in your background ensures your photos accurately reflect changes over time, making it easier to track progress. Keep the setup simple and uniform for each shot, so your skin remains the main focus of your photos.
Use of Natural Light
Using natural light is essential for capturing clear and accurate skin photos because it reveals true skin tones and textures without the distortions caused by artificial lighting. To maximize its benefits, consider these tips:
- Choose soft, indirect sunlight—morning or late afternoon light minimizes harsh shadows and highlights skin hydration.
- Avoid direct sunlight during midday, which can wash out your skin and obscure fine details.
- Position yourself near a window with plenty of natural light, ensuring consistent lighting for comparable photos over time.
Consistent use of natural light helps track genuine progress and highlights changes in skin hydration. Remember, proper lighting isn’t just about clarity; it’s about capturing your skin’s true state.

Auto Face Tracking Tripod 360° Rotating Cell Phone Photo and Video Kits Stand, No App, Camera Stand with Remote and Gesture Control, Rechargeable Smart Shooting Stand for Live Recording Tiktok(Black)
【360°Real-time Smart Face Tracking Shooting】This smart face tracking phone holder uses a real-time artificial intelligence computing system that…
As an affiliate, we earn on qualifying purchases.
As an affiliate, we earn on qualifying purchases.
Setting Up Your Camera or Smartphone for Consistent Results

To get consistent skin photos, make sure your lighting stays the same each time you shoot. Keep your camera or smartphone settings stable, like focus and exposure, to avoid differences in your images. By setting up these factors properly, you’ll guarantee your photos are clear and comparable over time. Additionally, understanding electric bike performance can help you choose the best conditions for capturing your progress. Knowing how your electric bike’s battery life varies with different terrains can also inform the best times and settings for your photos. Paying attention to soundproofing techniques can also create a quieter environment, reducing distractions during your photo sessions.
Consistent Lighting Conditions
Consistent lighting is essential for capturing accurate skin photos over time. It helps guarantee your images reflect true skin changes, not lighting differences. To achieve this, focus on these key points:
- Use diffuse lighting to soften shadows and reduce glare, creating even illumination across your skin.
- Avoid direct sunlight; instead, opt for consistent indoor lighting or a controlled light source.
- Regularly perform color calibration with a gray card or color checker to maintain true color representation in your photos.
Use Stable Camera Settings
Setting your camera or smartphone with stable settings is essential for capturing reliable skin photos over time. Consistent camera angles, focus, and exposure help guarantee your photos accurately show progress. Avoid using random photo filters, as they can alter your skin’s appearance and skew results. To maintain consistency, set your camera to manual mode if possible, locking focus and exposure settings. Use the same camera angles each time—whether straight-on or at a slight tilt—to compare images effectively. Keep the photo filters off or use the same filter if necessary. Here’s a quick reference:
| Setting | Tips |
|---|---|
| Camera angles | Use the same position and distance |
| Focus & Exposure | Lock settings to prevent adjustments |
| Filters | Keep filters consistent or off |
| Lighting | Match previous lighting conditions |
This approach ensures your photos accurately reflect your skin’s true changes.
Creating a Routine for Taking Skin Photos Over Time

Establishing a routine for taking skin photos guarantees you monitor changes accurately over time. Consistency is key to noticing subtle shifts in skin texture and pigmentation alterations. To create an effective routine:
- Pick a specific time each day or week, like morning after skincare or before bed, to maintain uniform lighting and conditions.
- Use the same spot and background to avoid distractions and ensure clear comparisons.
- Keep your camera settings stable, focusing on framing and distance, so each photo captures your skin uniformly.
How to Compare and Analyze Your Skin Photos to See Your Progress
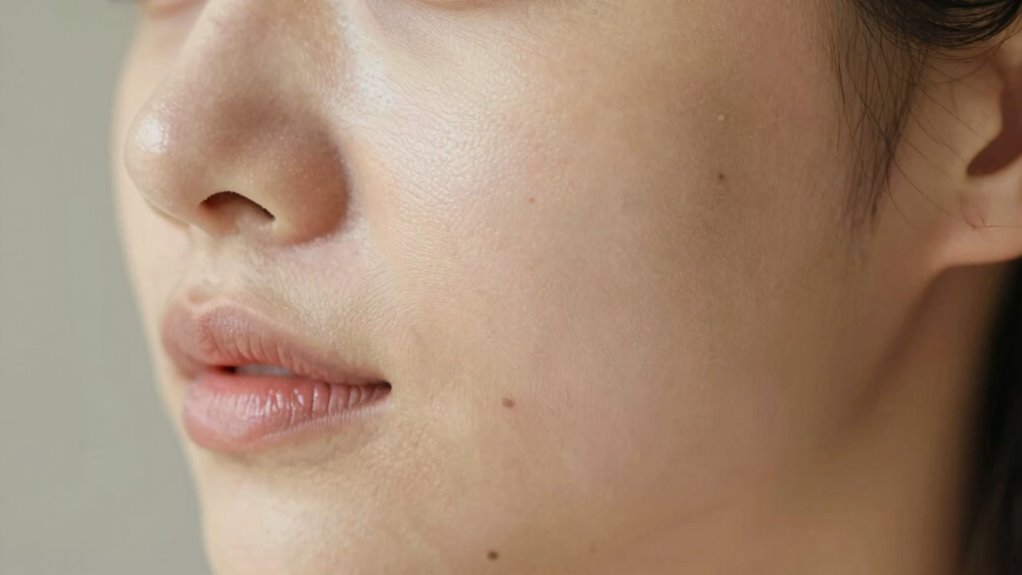
Once you’ve started taking regular skin photos, the next step is to compare them thoughtfully. Look for changes in skin texture and pore visibility over time. Focus on consistency in lighting and angles to guarantee accurate comparisons. Use a side-by-side approach to spot improvements or areas needing attention. To help you analyze, here’s a simple guide:
| Aspect | What to Look For | Tips for Comparison |
|---|---|---|
| Skin Texture | Smoother skin, fewer rough patches | Use magnification if needed |
| Pore Visibility | Reduced pore size or appearance | Note any areas with enlarged pores |
| Redness or Discoloration | Less redness or dark spots | Check for fading or new spots |
| Overall Clarity | Fewer breakouts or blemishes | Track persistent issues or improvements |
| Brightness | Even skin tone, radiance | Observe changes in dullness or glow |
Frequently Asked Questions
How Often Should I Take Skin Photos for the Best Results?
You should take skin photos every two weeks to track progress accurately. Make sure to use consistent photo lighting and stick to the same photo angles each time. This consistency helps you see true changes without lighting or angle variations skewing results. Regular shots every two weeks strike a good balance, giving you enough data to observe improvements while keeping the process manageable.
Can I Use a Mirror or Do I Need a Camera?
You can use a mirror selfie or a camera, but for the best results, a camera with good quality is ideal. Mirror selfies are convenient and quick, but they can sometimes distort proportions or lighting. A proper camera offers clearer, more consistent images with better control over lighting and focus. Whichever you choose, guarantee your setup remains steady and lighting stays consistent to track your skin progress accurately.
What if My Skin Looks Worse Before It Gets Better?
Your skin might look worse before it gets better, like a storm brewing before the sun shines. Don’t panic—skin fluctuation is normal during healing. It’s all part of the process, so have patience and trust your routine. Keep taking photos consistently; they’ll reveal the real progress over time. Remember, setbacks are just temporary waves on your journey to clearer, healthier skin. Stay committed—you’re moving forward!
How Do I Ensure My Skin Is Clean Before Each Photo?
To guarantee your skin is clean before each photo, follow your skincare routine consistently, including gentle cleansing to remove dirt, oil, and makeup. Use the same photo lighting setup each time to avoid shadows and color inconsistencies. Make sure your skin is completely dry and free of products that can alter its appearance. This consistency helps you accurately track your progress and see real improvements over time.
Should I Use Filters or Editing Tools on My Photos?
You should avoid filters or editing tools because they can distort your true skin condition. Instead, focus on capturing photos in natural lighting and from consistent angles to accurately track progress. This approach guarantees your photos reflect real changes, making it easier to see improvements over time. Keep your setup simple, and resist the temptation to enhance images artificially, so your progress remains honest and reliable.
Conclusion
By taking consistent skin photos, you’ll clearly see your progress over time. Imagine noticing your acne fading after two months of diligent photos, giving you confidence in your skincare routine. Just like Sarah, who tracked her journey and celebrated her clear skin breakthrough, you’ll stay motivated and make informed decisions. Stick to your routine, stay patient, and your photos will become your most trusted skincare tool. Your visible progress is worth the effort!